RSS Feed

2007

    Kelas Asas Decoupage April 2018

    BungaTelur.com akan mengadakan kelas untuk mempelajari teknik decoupage di atas pinggan seramik/cermin kayu. Semua bahan akan disediakan. Hasil kerja boleh dibawa balik.

    Jadual kelas adalah seperti berikut:

    Tarikh: 29 April 2018, Ahad

    Masa: 2:00 - 5:00 petang

    Yuran: RM80

    Tempat: Puchong (lokasi akan diberitahu kepada peserta yg serius)

    Terhad kepada 6 peserta

    Sesiapa yang berminat, sila email ke [email protected], atau sms/wa ke nombor 012 6482121 untuk maklumat lanjut. Peserta digalakkan membuat tempahan awal kerana tempat adalah terhad.

    Untuk melihat contoh decoupage yang dihasilkan oleh peserta kelas sebelum ini, sila lawati http://news.bungatelur.com atau laman Facebook BungaTelur.com

  1. Shaping The Flower Petals

    March 29, 2007 by admin

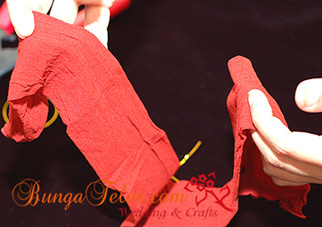
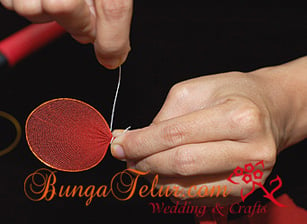
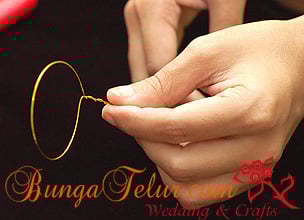
    This will show you how we shape the wire loop into flower petals.

    rdiyz11.jpg

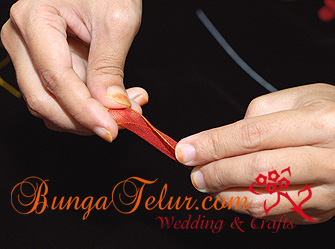
    Using the round shape wire loop which has been wrapped with nylon material, we will proceed to the next step of shaping the petals. Using your fingernails, pinch a bit at the wire. Try to imagine how the petal curves look like.

    rdiyz12.jpg

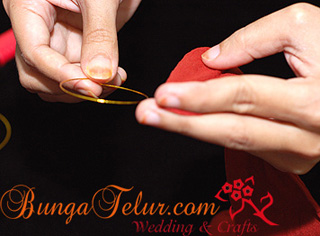
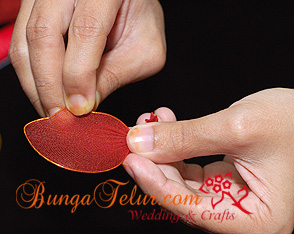
    After you have pinched every right and left side of the wire loop, it will look like this.

    rdiyz13.jpg

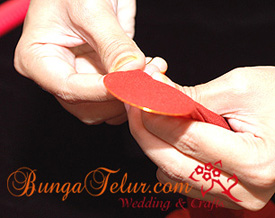
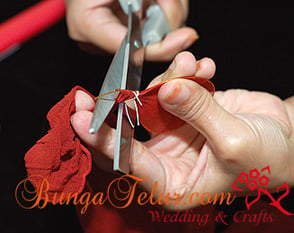
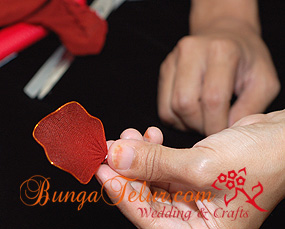
    Take another wrapped wire, this time we will fold it inside.

    rdiyz14.jpg

    Fold the left side into the right side or the vice versa, as long as the petal looks like a middle bud of a rose.

    rdiyz15.jpg

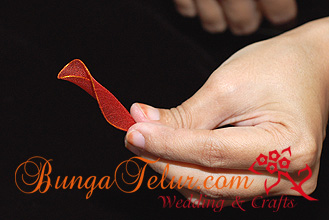
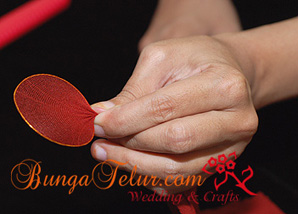
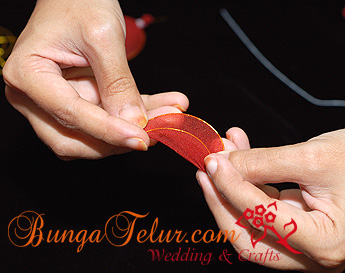
    This is how the folded petal looks like.

    We will continue with arranging the petals to form a rose.


  2. Basic Wire Loop II

    March 29, 2007 by admin

    Once you have made all the necessary numbers of wire loops, it’s time to wrap them around the nylon material. The nylon material looks like a woman’s panty hose. It has a variety of colors.

    rdiye5.jpg

    This is how the nylon material looks like. We will start from one end, inside the nylon material.

    rdiye6.jpg

    Put the wire loop you have made earlier inside the nylon material. We want the nylon material to wrap all the front and the back of the wire loop.

    rdiye7.jpg

    The nylon material should envelope both front and back of the wire loop. It should fit snuggly but don’t stretch too hard or you will tear the material.

    rdiye8.jpg

    This is how it should be once you have stretch the nylon material nicely around the wire loop.

    rdiye9.jpg

    Once you have satisfied, use a flower wire size 28 and tie around the end of the nylon material and your wire loop.

    rdiyze10.jpg

    Once you have tied the flower wire no. 28 around the material, snip the excess nylon nicely. Wrap the excess wire around the wire loop holder.

    You have successfully wrap your wire loop with the nylon material! Congrats!


  3. Basic Wire Loop

    March 29, 2007 by admin

    Since I have been conducting flower making class using nylon material for beginners level starting from last December, I have been requested to do DIY online guides for those who are unable to attend my class in Selangor.

    So this is the first entry for DIY flower making class. Personally I feel that this is more suitable for intermediate level as you need to use a lot of wire loop to make the rose.

    rdiy1.jpg

    First take the wire and put it around a round bottle or plastic case. In nylon flower basic, all the wire loop should be in round shape. Check the one on the left side of the plastic case. That’s what I want to make – a rounded wire loop.

    rdiye2.jpg

    Pull the wire around the round plastic bottle and tie it in a knot.

    rdiye3.jpg

    After you have tied one end in a knot, leave another end about 1 to 1.5 inch before you cut it with wire cutter.

    rdiye4.jpg

    This is the basic round shape for wire loop that we need to make. For rose, we need about 8-13 of them, up to the size of the rose you would like the end result to be.