RSS Feed

May, 2011

    Kelas Asas Decoupage April 2018

    BungaTelur.com akan mengadakan kelas untuk mempelajari teknik decoupage di atas pinggan seramik/cermin kayu. Semua bahan akan disediakan. Hasil kerja boleh dibawa balik.

    Jadual kelas adalah seperti berikut:

    Tarikh: 29 April 2018, Ahad

    Masa: 2:00 - 5:00 petang

    Yuran: RM80

    Tempat: Puchong (lokasi akan diberitahu kepada peserta yg serius)

    Terhad kepada 6 peserta

    Sesiapa yang berminat, sila email ke [email protected], atau sms/wa ke nombor 012 6482121 untuk maklumat lanjut. Peserta digalakkan membuat tempahan awal kerana tempat adalah terhad.

    Untuk melihat contoh decoupage yang dihasilkan oleh peserta kelas sebelum ini, sila lawati http://news.bungatelur.com atau laman Facebook BungaTelur.com

  1. Decoupage On Plate

    May 31, 2011 by admin

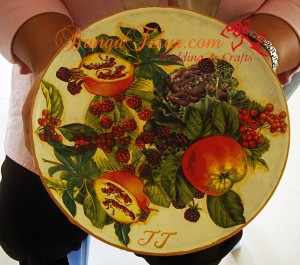
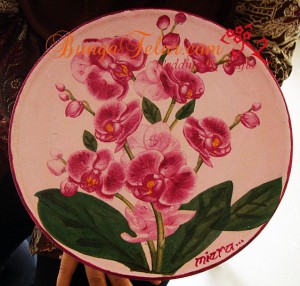
    It has been a while since I conducted decoupage class. This time I couldn’t get the usual mugs I used for past class. I ended up buying plates.

    The good thing is the participants have many space to pour their creativity to cut and paste down the decoupage napkin.

    (Please click to view bigger image)

    2 of them even signed their initial on their decoupage plates. I helped one to do shading on her plate. Since there was ample time I let them do lining around the plate.

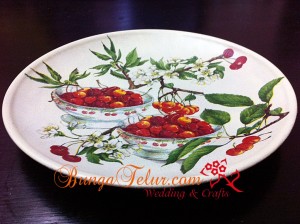
    This picture of plate with cherry design was taken by the participant herself and emailed to me later. I forgot to snap the picture while in class as she was the first person to finish and went home..hehe!

    Next time I think I will incorporate writing sentiments on the plate for those who are interested to do so. Time to scout and print some great wording suitable for home decor..heh!


  2. Nook Giveaway At Teacher Jessy’s Blog

    May 30, 2011 by admin

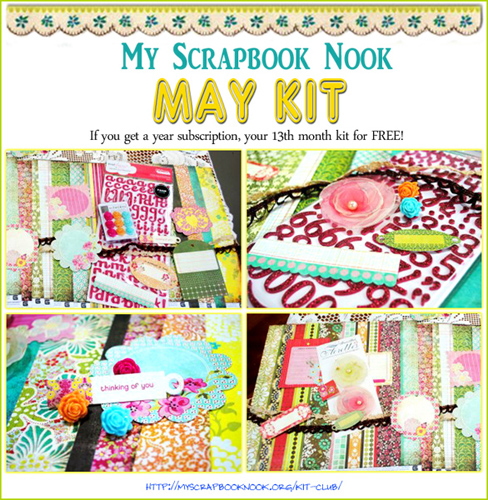
    Good news everyone! Teacher Jessy has a Nook May’s kit to giveaway. The Nook kit is filled with gorgeous Basic Grey Luscious collection as shown in the picture below.

    If you want to play along, this is what you have to do:

    1. Be a follower of Teacher’s Jessy blog.

    2. Subscribe for the MyScrapbooknook newsletter.

    2. Copy this entire information and post about this on your blog, together with the May kit picture and a link back to the post at Teacher Jessy’s blog – Nook Giveaway .

    3. Make sure you also post the information about the current offer at the Nook listed below.

    4. You have until midnight May 31st, Malaysian time (GMT+8). One winner will be drawn randomly among the participants.

    My Scrapbook Nook is offering a wonderful offer for a limited time only! Sign up for 6 months and receive the May kit for free……great deal, but good only while supplies last

    Or Sign up for 12months and get the 13th kit free!!!!!!!!!

    Kits value between $31- $34 – Yours for only $29.50. This way we ensure that you receive a fully loaded kit each month. We will also offer combined shipping with any add-ons or goodies from the store you need. Click the link for more info : http://myscrapbooknook.org/kit-club/

    Tell a friend and if they sign up email us at [email protected] and give us your friends name and we will give you a $5.00 store credit.

    So hurry up! Who knows you might be the lucky winner of one gorgeous kit from the fabulous kit club.


  3. Decoupage On IKEA Clock Rusch

    May 27, 2011 by admin

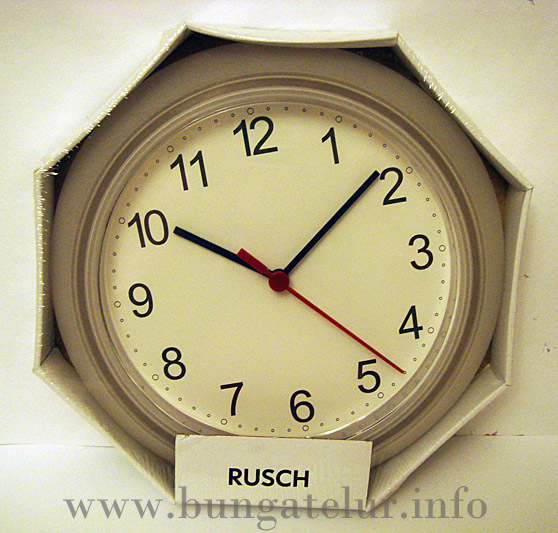
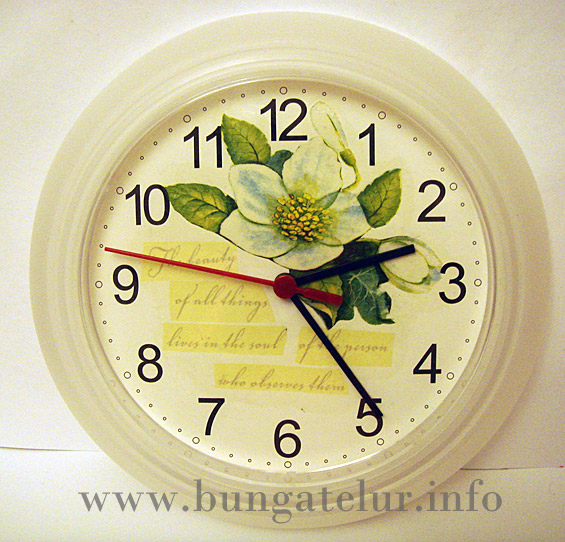
    I’ve decoupaged this IKEA clock RUSCH like months ago. It is a cheap clock sold at IKEA Mutiara Damansara for RM3.90. I usually scout for suitable things to decoupage whenever I go to IKEA.

    The body of RUSCH is plastic. You can even do decoupage around the body. I’ve seen people sell such decoupaged clock at flea market in Amcorp Mall and the Curve but couldn’t remember the price.

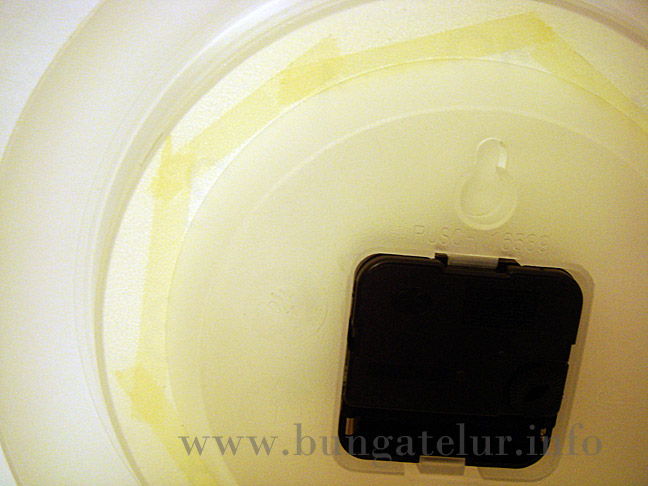
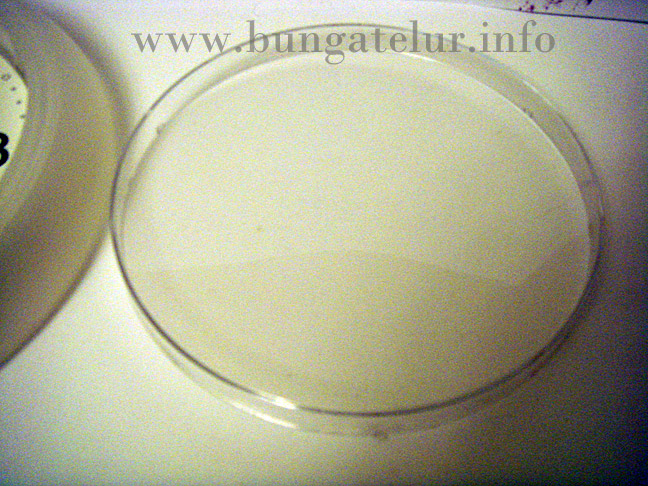
    When you take out the clock from the box it comes from, turn at the back and you will find 3 holes. You should be able to tweeze the edge of its plastic face out if you plan to do decoupage inside the clock.

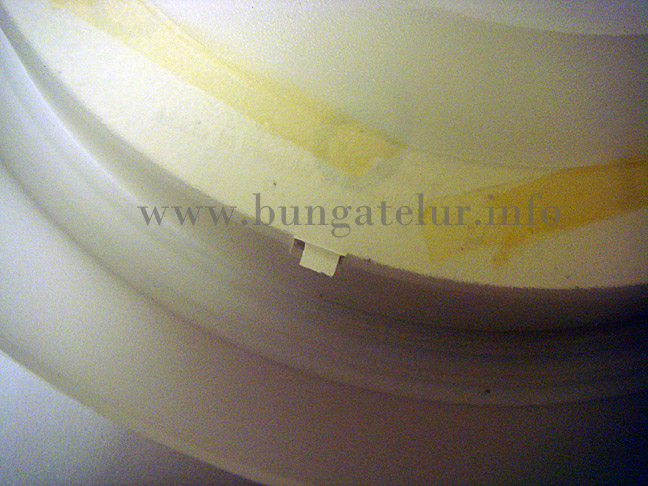
    Here is how one of the holes at the back of the clock looks like.

    This is how the front face cover of the clock looks like once you have tweezed the edges out from the holes.

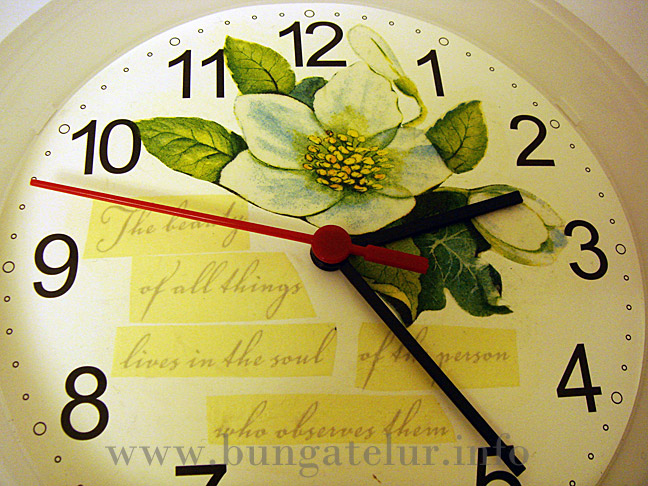
    I found a paper napkin with gardenia design on it. The napkin even has great sentiments – The beauty of all things lives in the soul of the person who observes them.

    I didn’t want to cover the numbers because it will be easier for me to see what time in my craft room. I tend to overdo the time I allocate myself whenever I start to do any crafty work.

    Once you have done with decoupage, you have to put the plastic face cover back on the clock. Make sure all the edges fit nicely back into their holes.

    There you have, a one-of-a-kind IKEA wall clock. A good idea for housewarming and wedding present for those who are not so choosy when it comes to the price of a gift.


  4. Sew Your Own Flower

    May 25, 2011 by admin

    I was so inspired to make my own scrap fabric flowers after watching youtube video and read the instructions on few craft blogs. I realized long time ago that I am not so good and patient when it comes to sewing but doing a simple fabric flower like this is not so much work, something that could be done in like 10 minutes or so.
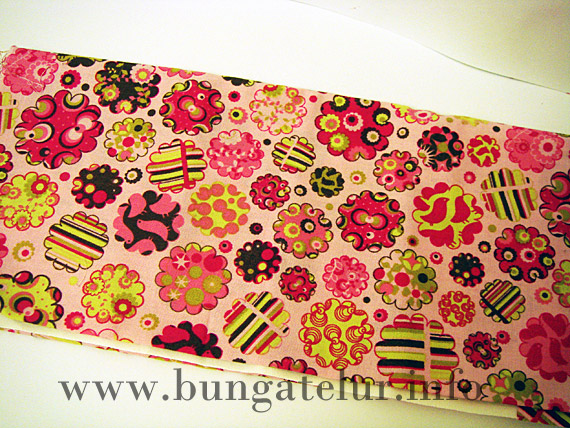
    I tweeted and asked where I could get good cotton scraps. A crafter friend, Tini of SnazzynSuch recommended for me to check Kamdar or Nagoya but later she dug her stash of fabrics and offered to sell me some..hehe!

    This is American Cotton and it is such a joy to sew with it compared to cottons I bought from the nearest Kamdar. I couldn’t get any scrap pieces from the shop, the least amount they will sell to you is 1/2metre.
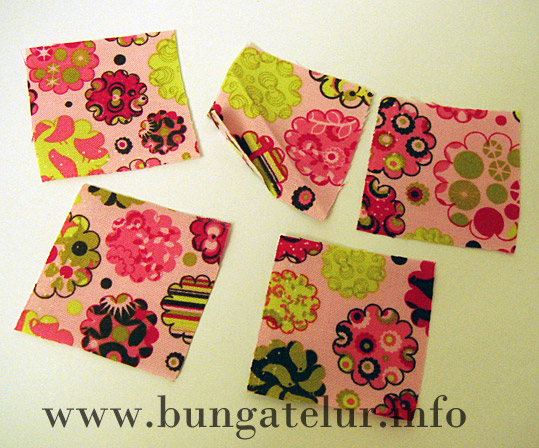
    First you need to cut 5 squares out of the scrap fabric. I think mine were 6 x 6cm. You can experiment with different size since the bigger square you cut, the bigger petal your flower will have. It depends on what you want to do with the end product. If you were to use on cards and scrapbook layout, I think 6x6cm squares will be good enough as it will produce a flower with 6cm diameter in size.
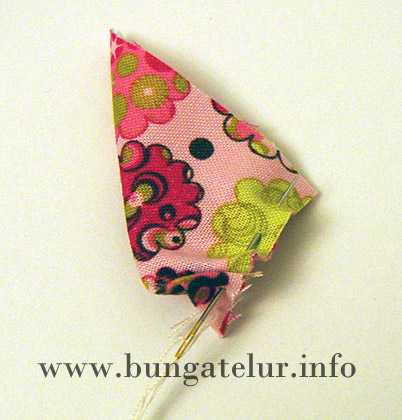
    The first step after you have cut the square is to fold it into triangle. The right side of the fabric design should be up. Get ready with your thread and needle and start sewing from the most left edge of the triangle.
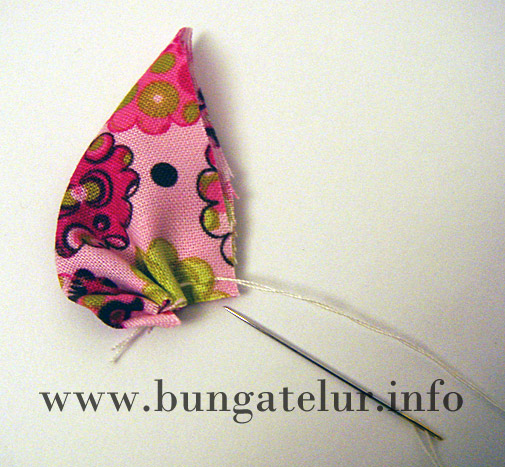
    When you have come to the next triangle edge, pull the thread and you can see that the petal shape has started to emerge.
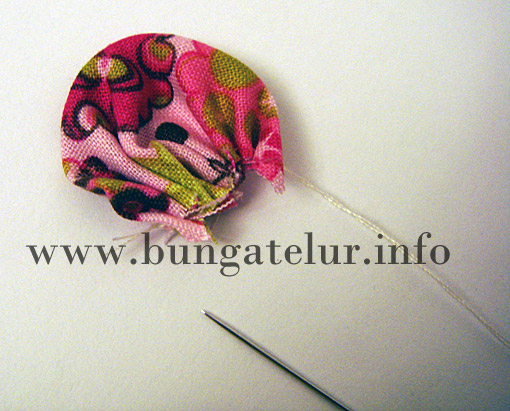
    Continue stitching along to the next edge. You don’t have to stitch very tight and neat, just enough to bind the fabric together so that you can pull the thread later.
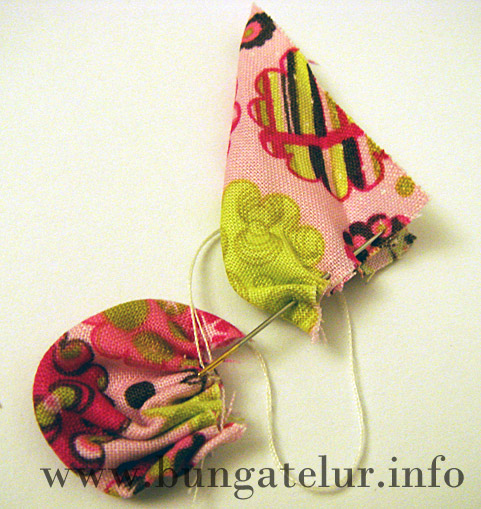
    Once you have completed the first petal, continue stitching with the second triangle.
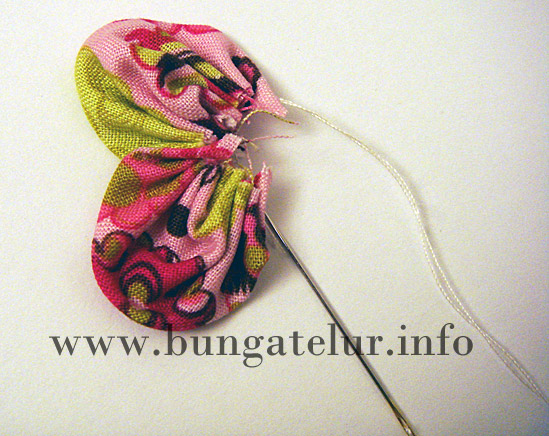
    This is how it will look like once you have completed two petals. Continue stitching all the 5 petals.
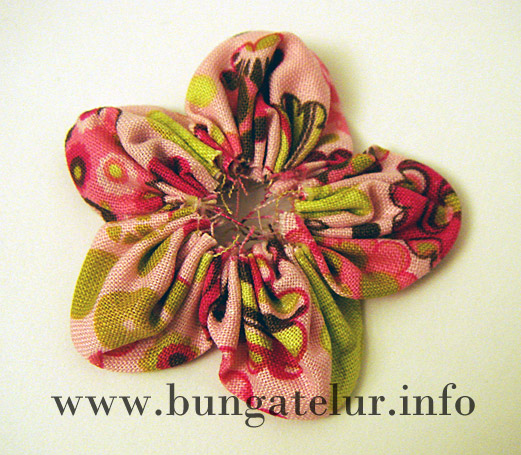
    Once you have completed the 5th petal and tie the knot on the thread (I turn the flowers and tie the knot at the back), you will find out that there will be a hole in the middle of your completed flowers. You can use button or even another flower like crochet flower to layer on top of the hole.
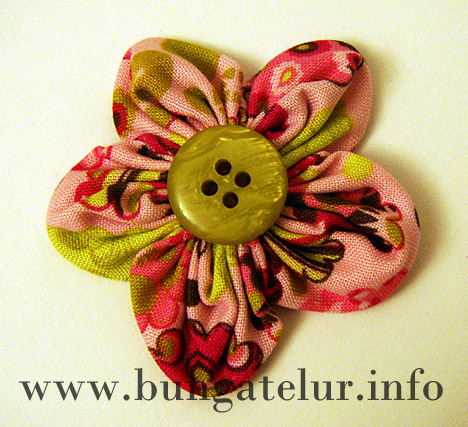
    For this particular flower size, I have to use a button with diameter 25mm to cover the hole. I usually use Glossy Accent to glue the button. Not sure whether hot glue gun will work as well. Will try with different type of adhesive to see what work best.

    Oh, you can also use paper or cardstock cut into round shape to be glued at the back of your completed fabric flower if you were to use it as embellishment on scrapbook layout or cards. But if you were to use this fabric flower as embellishment on bag, headband or hair clip, then you won’t need to use the paper backing suggested.

    If you manage to make your own fabric flower after reading this short tutorial, I will be very happy to see the picture of your handmade fabric flower or simply read your comment about it.
  5. Welcome The Baby Girl Card

    May 22, 2011 by admin

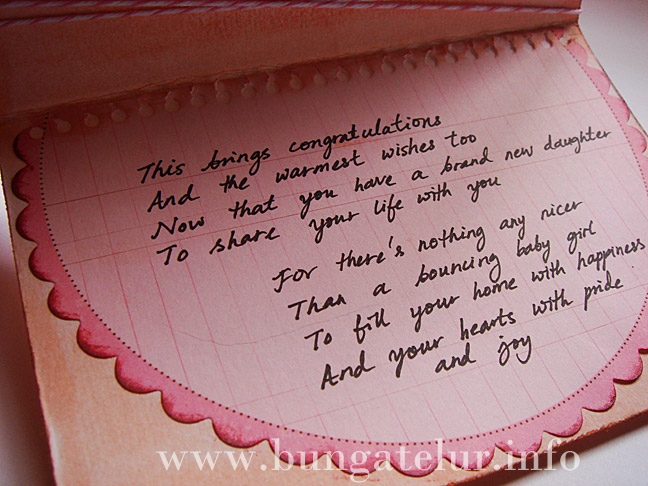
    My neighbor gave birth to a new baby girl and brought home the bundle of joy in April. I thought of giving something handmade when I went to visit them so I quickly made this pink card the night before.

    (Please click to view a bigger picture)

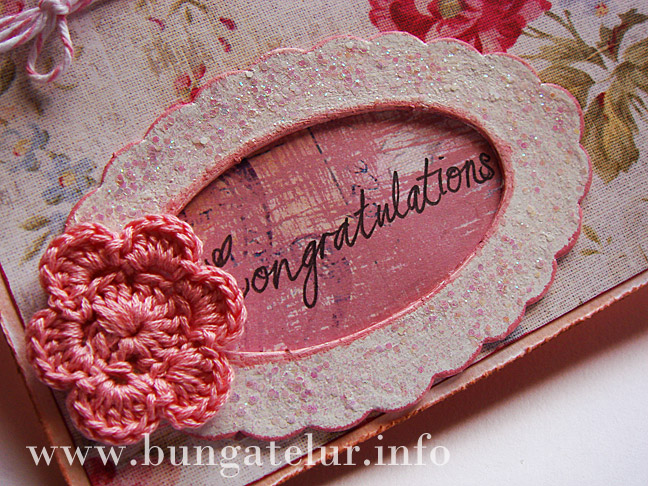
    It might not be the most sparkly and shiny card that I’ve ever made, but I thought this should be entered into Simon Says Stamp Sparkle and Shine challenge. It has been a while since I’ve made a card for a challenge. The scallop chipboard was painted in pink and sparkled with Jo Sonja Opal Dust many, many moons ago for my experiment. When I came up with this baby card idea, I found the painted chipboard among my craft stash and decided to use it on the card as the frame for the sentiment.

    I also realized that the color used for this card is kind of monochromatic, all pinkish and very soft, unlike most of the scrapbook layout I’ve made before. Here it goes for The Shabby Tea Room Week 62 – Monochromatic challenge.

    I think I should make more girlish and pink layout or cards in the future as it made me feel so happy inside. When you are living with men (a little man included) on daily basis for years, you tend to forget how to be a pink girl at heart..huhu!

    I didn’t spend much time making this card so I thought using a handmade crochet flower will make it more special. I can’t say much about my own handwriting though..it’s been a while since I actually write something as long as a poem. (The most that I’ve done these days are perhaps scribbling groceries list..huhu!) What can I say, with the modern invention of keyboard and printer post college years, I am glad that I can still read my own handwriting..haha!

    So here is another entry for Scraptivations Challenge 4 – use your handmade embellishment.


  6. Scrap It Lah Anniversary Blog Hop Week 7 Challenge

    May 19, 2011 by admin

    Finally I managed to complete the final challenge for Scrap It Lah Anniversary Blog Hop…pheww!! (pat myself for a good job managing time and juggling life) The only weekly challenge that I did not manage to enter is the altered canvas because I was away on family vacation.

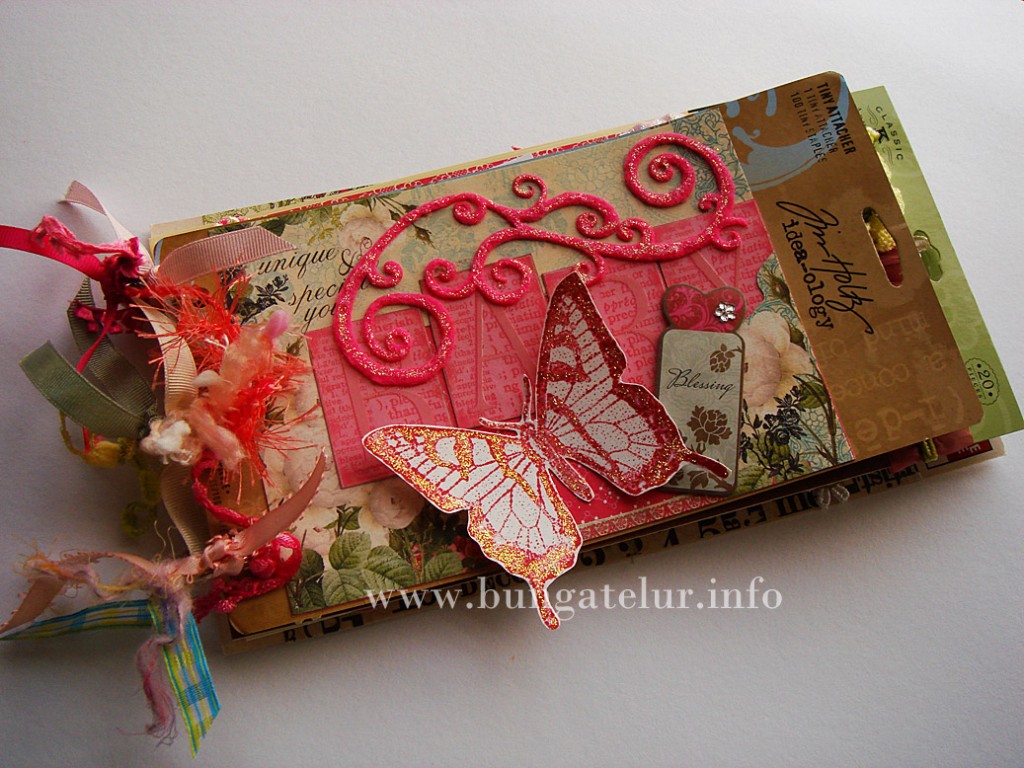
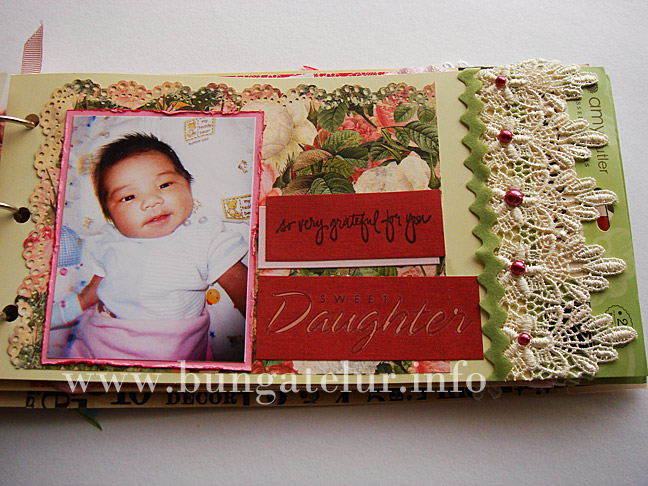
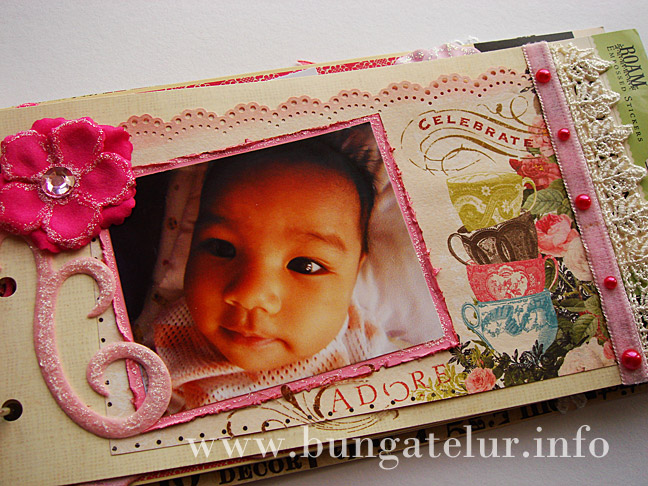
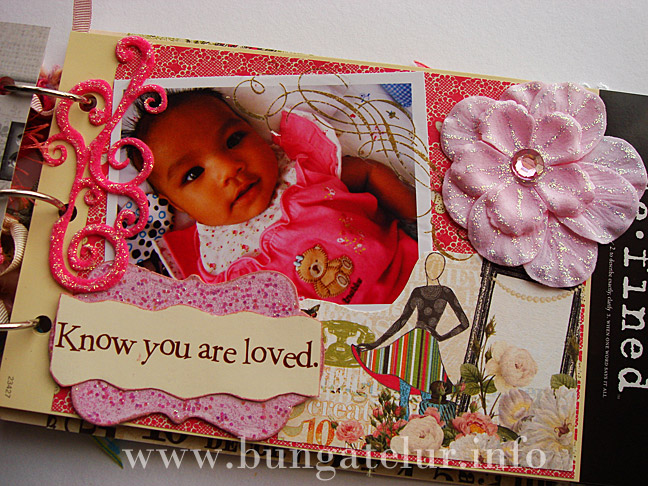
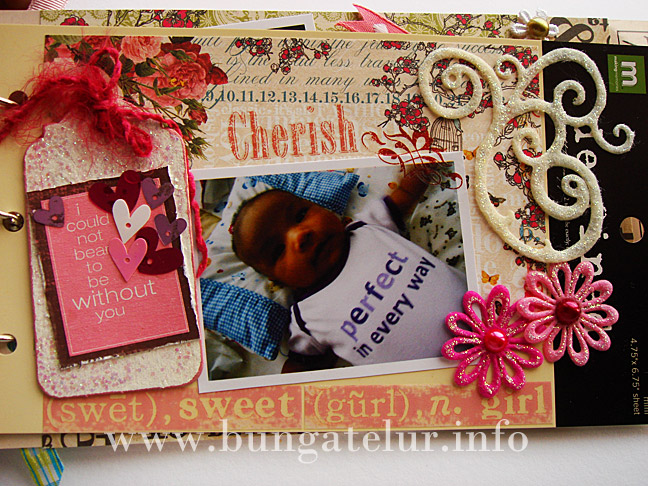
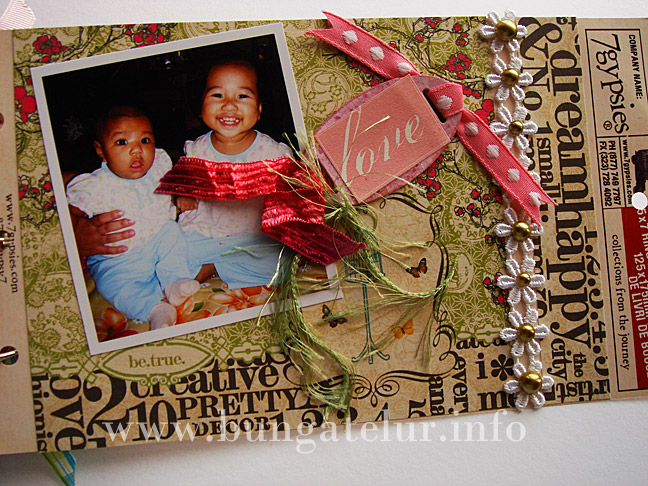
    For a start I never thought we could do anything with the packaging. Since I haven’t done any major scrapbooking stash shopping spree for years, I have to dig out all my old stuffs and see whether I can find the minimum amount of packaging required for this challenge which is 6. I managed to find 7 pieces, most of them are stickers packaging either from K&Company and Making Memories, one from 7Gypsies ring book cover and the latest is the tiny attacher packaging from Tim Holtz.

    Next I contacted my niece asking for her permission to use her daughter’s pictures as part of my mini album contents. She agreed and emailed me few pictures to choose.

    So here is my second grand niece..heh! She was born last year in December. I thought once completed, the mini album will be given to my niece as a gift. I am satisfied enough that I get to use all this pink girly stuff for my creation, after all I only have a son..haha!

    Note to myself, next time if I buy rub ons, I will use it as soon as possible. The old rub ons did not stick well to the layout. Some of the letters in the word could not stick smoothly no matter how hard I rub it, maybe the adhesive is gone after years of hoarding..huhu!

    I used patterned papers from the Webster’s Pages 6 x 6 TRENDSETTER Petite pad I bought last month online. This time around I have promised myself that if I find something I love I’m going to use as much as possible in my layout and cards.

    The lace and frills (as seen in picture 2, 3 and 4) were bought at a local handicraft store when I went shopping for my craft class materials early this month. For most of the pages I tried to put coherent embellishment like felt swirl and felt flowers. Of course as you can see, I have used a lot of diamond stickles in this mini album. Maybe I should get more color choices for stickles.

    I also managed to use the old chipboards which have been painted in pink acrylic paint and later brushed with Jo Sonja Opal Dust. Most of the sentiments on the chipboards are stickers. I did not manage to print any journaling for this challenge. Maybe later I will ask my niece to have a look and see whether she wants to add some journaling in her own words.

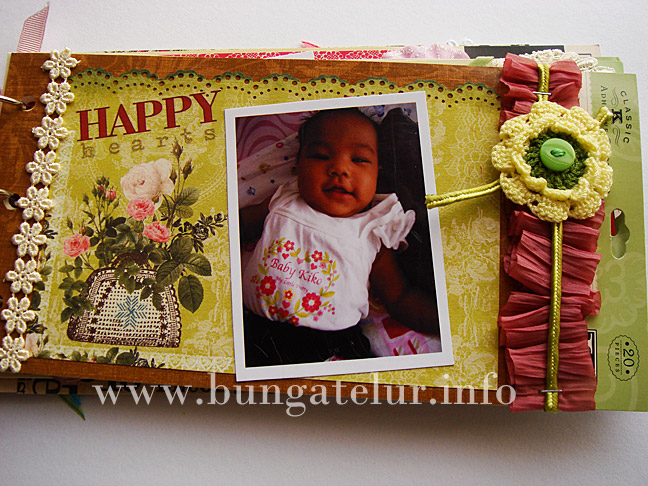
    Oh, check out the bright smile of my first grand niece. Both of them happened to wear the same design of outfit but in different size. I didn’t know that she has the same design when I bought the blue pink outfit for my second grand niece..heh! I just can’t wait to see both of them grow up to be happy and cheerful girls. Nek Su love you girls so much!!


  7. Decoupage On Wood/MDF Board

    May 18, 2011 by admin

    Please click to view bigger picture.

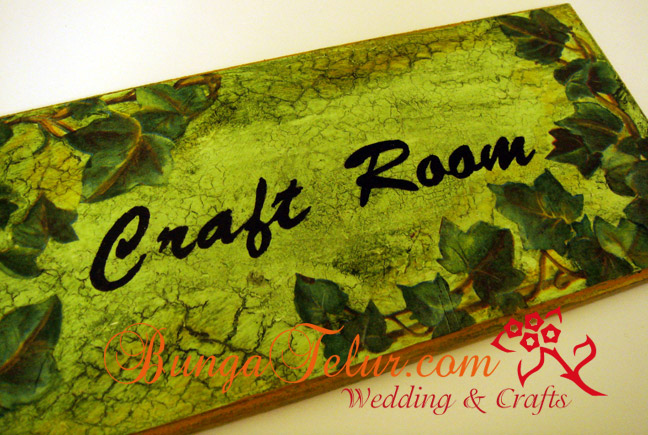
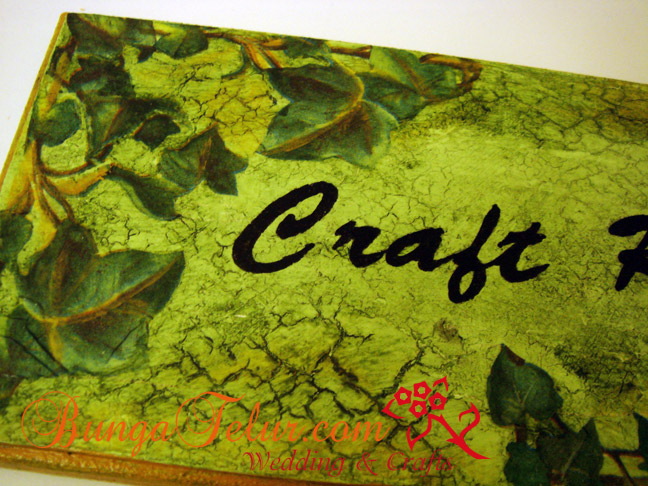
    I have done the background for this MDF board door sign for ages. I think it was my beginner’s attempt to do crackle effect. I can’t even remember which brand of crackle medium I used for this particular work since I have tested several until I finally stick with Crackle Medium from Plaid bought at Art Friends, The Gardens.

    After reading what my decoupage buddy did in a local craft forum, I decided to try printing out the wordings, trace them onto the painted and decoupaged MDF board and later paint the traced words using black acrylic paint. Of course you will need to use liner brush to paint the wordings. I thin down the acrylic paint using Flow Medium to make it easier to control the flow of the stroke.

    I think I will find a wooden stool and use the same climbing ivy design. The ivy design came from paper napkin. Oh, I need to find some screw and framing hook so that I can hang the completed door sign on my craft room door.


  8. SIL Second Anniversary Blog Hop – Challenge No.6

    May 8, 2011 by admin

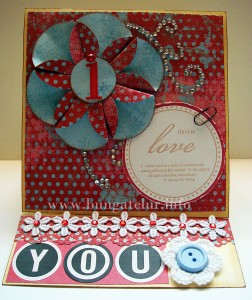
    I created this easel card to enter into SIL Second Anniversary Blog Hop – Challenge No.6. Please visit Jessy’s blog to see the details here – Teacher Jessy’s Blog.

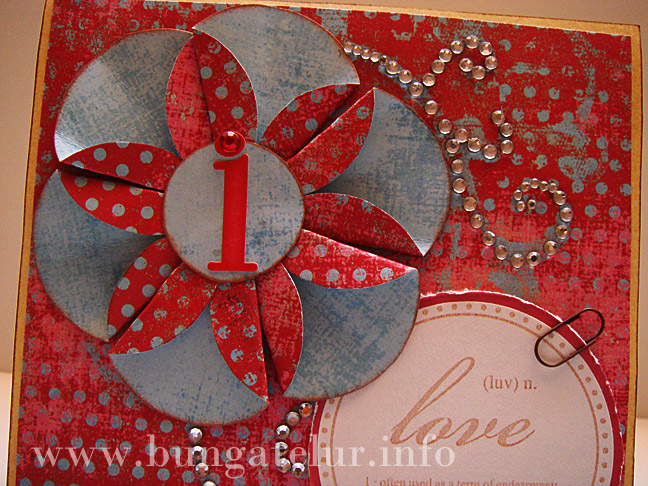
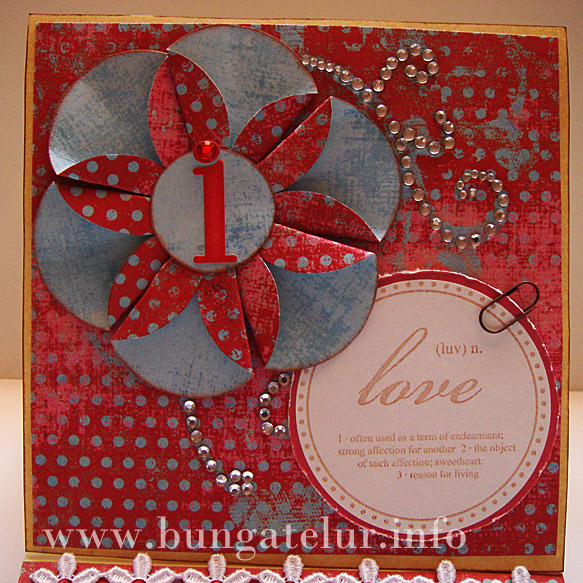
    The requirement of the challenge is to make a handmade folded flower from patterned paper and to use it in a card.

    (Please click picture to view a bigger version)

    I don’t have any circle punch so I have to improvise using a pencil compass in the geometry set I bought from Popular bookstore. I made a template of 1 in, 1.5in, 2in and 3in diameter circle on a piece of cardstock I kept from empty packet of photo paper. (Another attempt to upcycle material and save cost..haha!)

    The chosen folded flower in the picture above was made using 1.5in circle size. I made another one using 2in template but it was too big to be put on a card. Perhaps I will use in my next scrapbook layout. The patterned papers used for this card is from Magnolia line of My Mind’s Eye.

    My son helps me in embellishing this card by putting the rest of the gemstones when we woke up on Mother’s Day. We used some non self-adhesive clear gemstones I got in a goodie bag. His job was to pick each one of the gemstones and put them on the card and helping Mama to screw the Tombow glue cover back on the bottle.

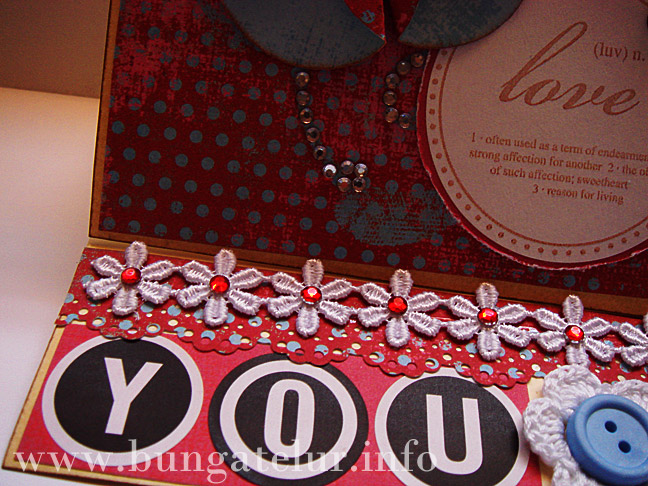
    The rest of the card has been completed the night of Mother’s Day after he fell asleep around 2:15am. I decided to make this card as a “I Love You” card after finding some Making Memories sentiment that defines Love.

    I also used a crochet white flower I did many months ago to go with the MM white flower trims I embellished in the inside part of the easel card. The red gemstones are from Kaisercraft.

    Overall I was happy with the outcome of this easel card. And hopefully it is not too late to wish all the mothers out there, Happy Mother’s Day!!