(Please click to view larger picture)
This came out on 22 March 2012 in Harian Metro. The last of 4 articles.
I made bunga dulang from bunga dip to accompany the box I decoupaged. The item for barang hantaran can be put inside the round box.
BungaTelur.com akan mengadakan kelas untuk mempelajari teknik decoupage di atas pinggan seramik/cermin kayu. Semua bahan akan disediakan. Hasil kerja boleh dibawa balik.
Jadual kelas adalah seperti berikut:
Tarikh: 29 April 2018, Ahad
Masa: 2:00 - 5:00 petang
Yuran: RM80
Tempat: Puchong (lokasi akan diberitahu kepada peserta yg serius)
Terhad kepada 6 peserta
Sesiapa yang berminat, sila email ke [email protected], atau sms/wa ke nombor 012 6482121 untuk maklumat lanjut. Peserta digalakkan membuat tempahan awal kerana tempat adalah terhad.
Untuk melihat contoh decoupage yang dihasilkan oleh peserta kelas sebelum ini, sila lawati http://news.bungatelur.com atau laman Facebook BungaTelur.com
March 26, 2012 by admin
(Please click to view larger picture)
This came out on 22 March 2012 in Harian Metro. The last of 4 articles.
I made bunga dulang from bunga dip to accompany the box I decoupaged. The item for barang hantaran can be put inside the round box.
Category Craft Ideas | Tags: | No Comments
March 16, 2012 by admin
This gets published in Harian Metro 15 Feb 2012. Thanks to someone who bought the copy, saved and snail mailed it to me.
(Please click image to view bigger version)
For this particular gubahan coklat for hantaran, I used rose made from daun getah (rubber tree leaves) bought from a supplier. I took out the inner petals to fit in the Ferrero Rocher inside.
It’s now available for sale at RM50 (not inclusive of the chocolate).
If you are interested to buy, please leave comment.
Category Craft Ideas | Tags: | No Comments
March 15, 2012 by admin
(Please click to view larger image)
I bought this Malma frame from IKEA since last year and didn’t do anything with it until recently. This time using the plain color Malma frame, I painted it in Plaid Taffy. After I have decoupaged the surface with the decoupage napkin with pink rose motif I decided to apply Jo Sonja Crackle Medium on top of it.
Once it has started to crackle, I rubbed in Plaid Forest Green. The Crackle Medium used creates a tiny, porcelain like cracks that are quite hard to notice unless you rub in a second contrast color than the surface.
Oh, the wording has been printed on paper, traced on tracing paper then traced again using graphite paper on the frame surface. I colored in with black acrylic paint using a liner brush. Some people prefer to use marker pen for wording but I always color in my wording using acrylic paint. This way I don’t have to worry about the marker ink bleeds when I varnish the finish product.
Overall I was very pleased with the result. The frame has been given to a friend as a gift.
Category Craft Ideas | Tags: | No Comments
February 20, 2012 by admin
After hoarding this key holder for a few months, I decided to do some decoupage on it. The original background color is Plaid taffy and ice green light. After I have done all the shading on the decoupage piece, I felt like trying the Jo Sonja Crackle Medium again. (Check the previous entry on the wooden box)
For those who are interested to try crackle effect, Jo Sonja has 2 different medium for crackle. The one that I used here is Crackle Medium. It’s a one step process which can be applied on top of the finished painting to get a fine crazing effect.
The other medium for crackle needs a topcoat color.
To make sure I can see the effect of the crackle, I rubbed some walnut stain into the cracks. However I think I used too much stain and it made the background color turned very dark (and look ugly) from the original color..huhu!
I think next time I will use acrylic paint in contrasting color (like dark green) with retarder to rub into the cracks instead of using walnut stain. Lesson learned!
Category Craft Ideas | Tags: | No Comments
February 2, 2012 by admin
This came out on 1st February 2012 in Harian Metro.
Please click to view a bigger picture.
For this demo, I used bunga dulang made from red songket to decorate the gubahan hantaran.
Category Craft Ideas | Tags: | No Comments
January 30, 2012 by admin
Please on the pictures to see a larger version.
I’ve bought this wooden box since 2006 but never do anything with it. So during the last long weekend, I decided to try the Jo Sonja Crackle Medium (again!) on the box. After putting a basecoat color, I applied the medium and it started to crack. I then applied walnut stain into the cracks.
I don’t really like the effect of the stain has on the surface as it created such a shabby rustic look. I proceeded with sealing the motif of roses from decoupage napkin. I then traced the wording and color in with black paint.
After I have finished doing all the wordings on the box, I realized that it looks much better plain like this. Well, what can I do, things were done and I have to live with the consequences. After all that’s what experimenting in craft will give you, a lesson to learn..heh!
Category Craft Ideas | Tags: | No Comments
January 12, 2012 by admin
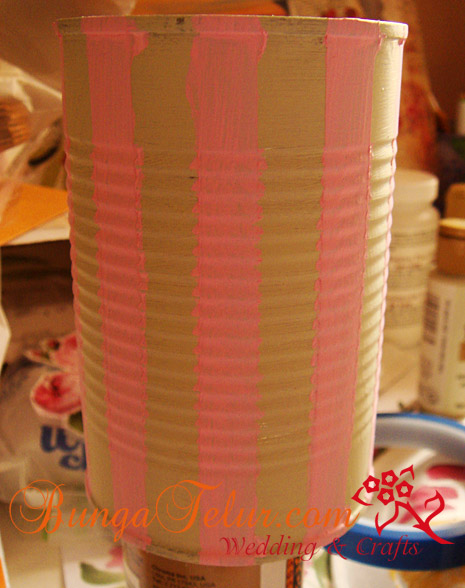
I’ve never tried painting stripe on the surface that I want to decoupage. So today I thought I will try it.
Using the craft tape which I bought for glass painting, I taped down a few strips around the tin after I have painted the base in Ice Green Light.
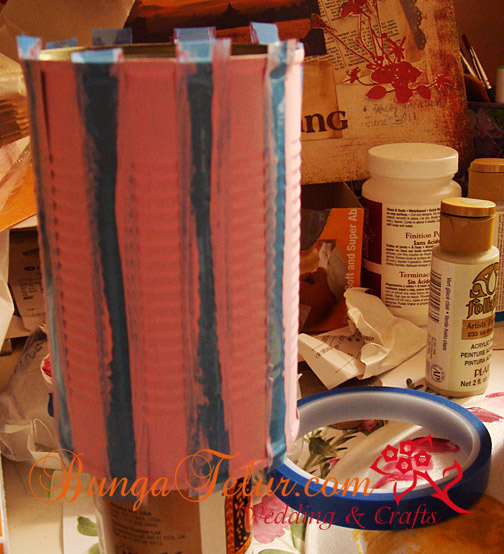
The craft tape doesn’t stick too hard on the surface so that’s no risk of the base color to be peeled off. But the problem lies in the second paint (in this case, Plaid/Folkart brand of Baby Pink) seeping under the craft tape making it all not crisp and smooth as I expected my stripes to be..huhu!
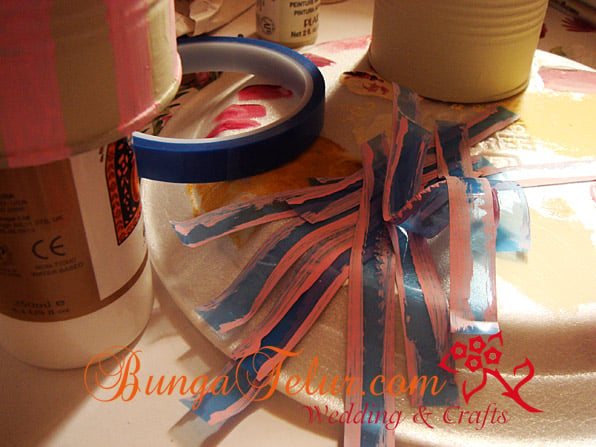
I read on the Internet that to ensure that the second color won’t seep under the craft tape, once we have tape down the strips, paint the base coat color along the edge of the craft tape. Let it dry and then only paint the second color. I will have to try out that tips on my second trial.
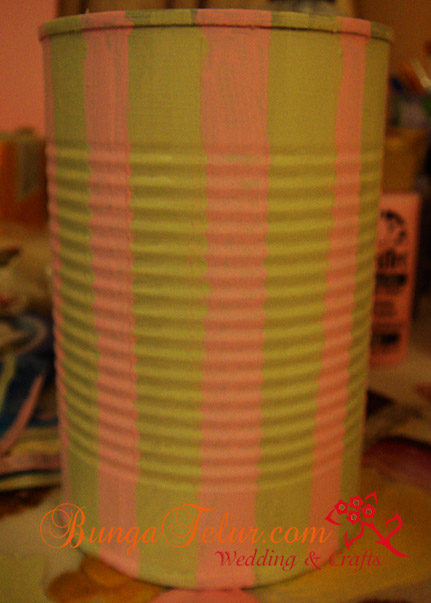
Since the first stripe trial result is not so great, I decided to touch up and make it more smooth (which in the end is not as satisfactory as I hope..sigh!)
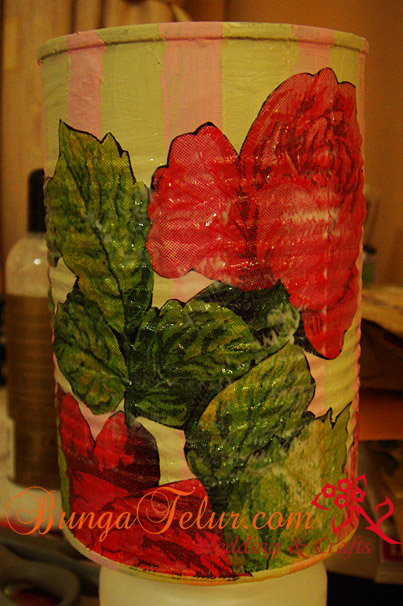
I used the Plaid decoupage finish to seal the rose motif.
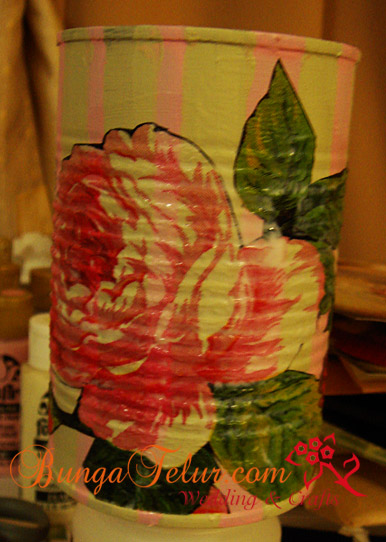
Another angle of the rose on the striped tin.
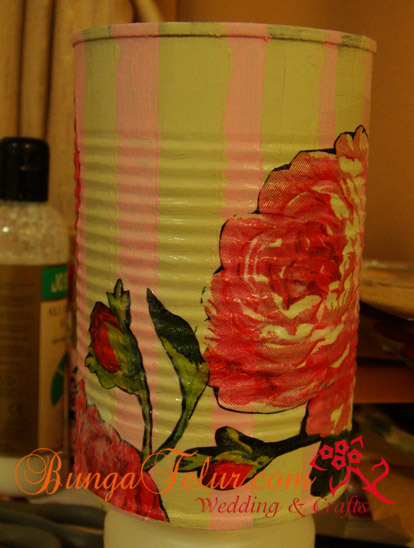
This is how it looks like after the sealer has dried out and before I decided to mess up the creation.
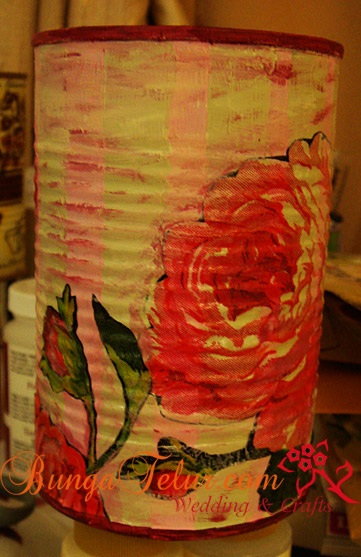
Somehow I feel that the Baby Pink stripes are too striking so I thought of shading some of the area in Berry Wine and Taffy. I haven’t varnish the end product but I am not happy with what I’ve done so far. Mistakes are hard to be avoided especially in craft experiment like this. I just hope I won’t do the same mistake next time.
Category Craft Ideas | Tags: | No Comments
December 15, 2011 by admin
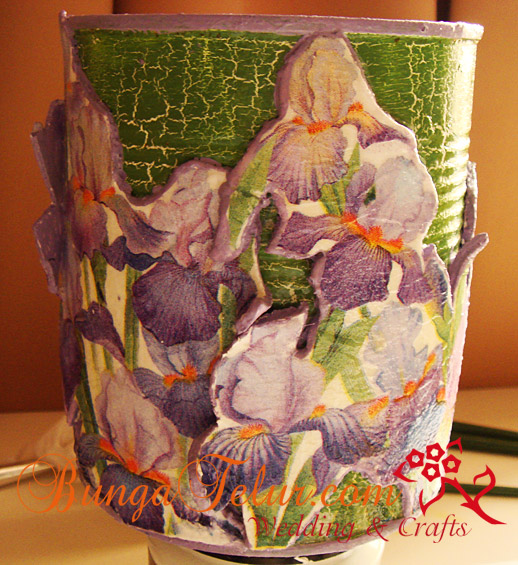
I’ve done the green crackled effect on the tin for quite some time. I thought I will just glue the iris motif from the decoupage napkin on the surface. However after I have pasted the purple flowers on green, the motif was drowned and it looks so bad..(err I should have taken some pictures to show how decoupage can go wrong..isk)
After thinking over the bad outcome, I decided to take out the air dry clay and start rolling the clay into thin pieces. Of course I need to cut another set of the iris motif for this makeover..sigh! After pasting the napkin motif onto the thin clay and cutting out the clay using craft knife, I quickly pasted each pieces on the tin. You have to do this before the clay dries out otherwise it will break.
The next day I colored the back of the clay which could be seen on the tin in lilac. On the third day I varnished the whole tin.
Next time if you want to use dark color for decoupage surface you can try doing this 3D decoupage technique. It is not that hard but certainly needs more effort compared to normal decoupage technique and takes longer time to complete the project.
Category Craft Ideas | Tags: | No Comments
November 28, 2011 by admin
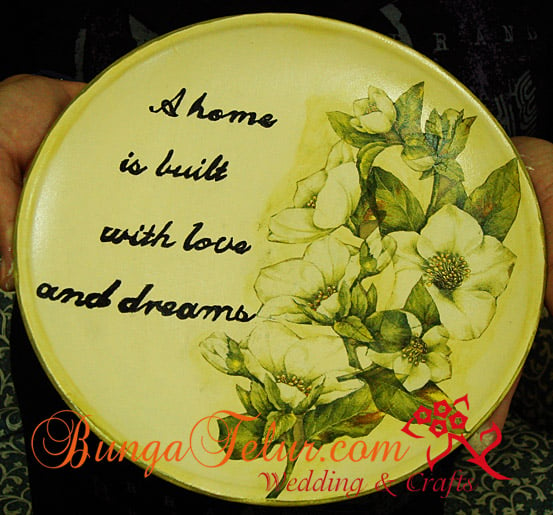
It’s been a while since I have decoupage class. This time since the participant was on time and I realized that she has ample time to complete the whole decoupage task, I decided to let her trace some wordings on the plate and color in using acrylic paint.
I usually thin down the paint using Flow Medium rather than plain water. Of course you need to have liner brush to make the color in process easier.
I think for the decoupage next class I need to prepare more simpler and shorter phrases if I were to add in the writing part in the syllabus..heh!
Oh, I have some new decoupage napkins/tissue to sell. You can check out my FB to see other collection of motif.
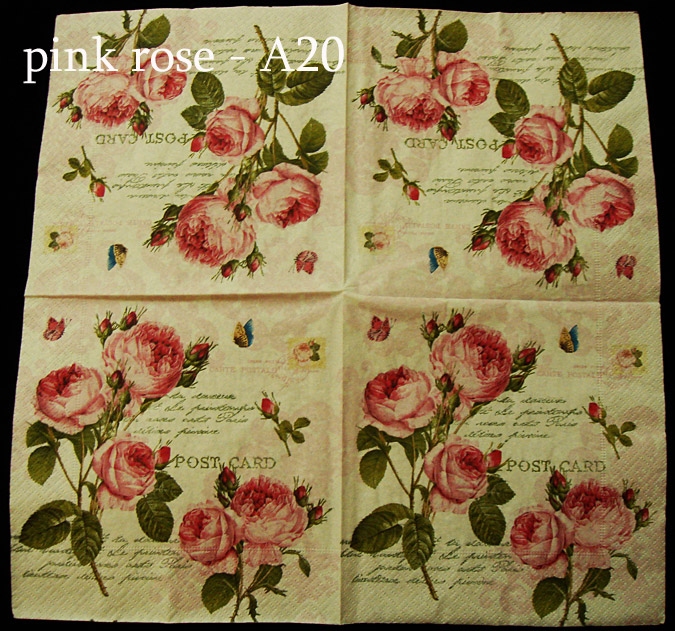
My current favorite is this sweet, pink roses.
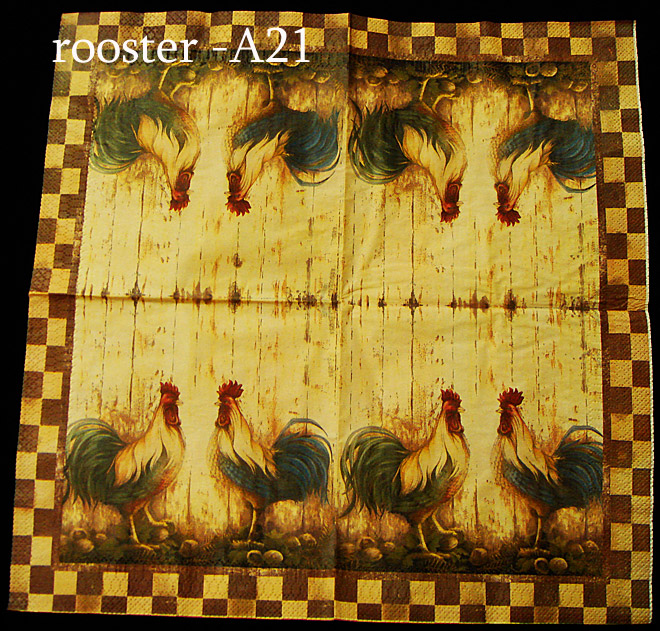
For those who want something different than the normal leaves and flowers, you can buy this rooster and brown country checkered motif.
Check out the folder – Decoupage Tissue For Sale for all kind of motif that you might need for your decoupage project.
Category Craft Ideas | Tags: | No Comments
November 22, 2011 by admin
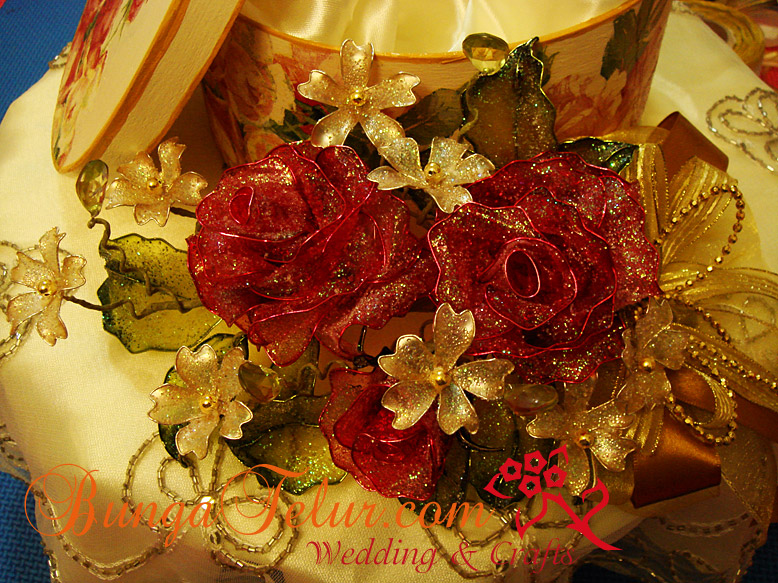
I did this set of bunga dulang from bunga dip for a photo shoot. Still waiting for it to be printed in the newspaper.
Anyway, for those who are interested to learn the basic technique on how to assemble bunga dulang which can be used as part of decoration for your gubahan hantaran, I will teach that in my bunga dip class. Next session will be held on Sunday 27th November, 2-5pm.
Once you know the basic on how to make bunga dip, you can do bunga pahar and other type of guest favors for VIP. The small flowers can be combined into corsages for the family of the bride and groom to wear. The ideas are endless.
Come and join the class. The fee is RM100. All materials needed for the class will be provided. You can take home whatever creation you manage to make during the 3-hour lesson.
Category Craft Ideas | Tags: | No Comments